Check Out This Guide to Building Your Own Model Railroad

Building a railroad model should be as easy as pie, as long as you have the resources. Well, not exactly. Of course, if you have the needed stuff to work on, it will help, but having them alone won't guarantee that the project will succeed. Like any other personal project, building your railroad model requires more than just resources – it will eat up your time, test your patience, explore your creativity, and measure your decision-making skills. It will be a rigorous effort just to work on a particular aspect of your railroad model.
But, do not be daunted. The hardships of building this project are what make the venture more worthwhile and fulfilling. Equipping yourself with the proper knowledge about the process will make your job much more manageable and guarantee the project's success. This article will be your guide in building your very own railroad model.
DECISION-MAKING STAGE
1. Laying Down The Plan
The first decisions you would make will determine the overall outcome of your project. Before even starting, decide on the theme, age or era, locale, scale, and kind of display you want for your railroad model. You have to ask yourself the questions:
- What would be the theme of my railroad model?
- What particular era do I like to imitate or get inspiration from?
- What particular sceneries do I like to see?
- Will I work on a large or small-scale project?
Answering these questions and visualizing the project let you get a 'concept' of your railroad model. You wouldn't want to produce an output that's chaotic and not cohesive. You must imagine as if you'd ride the train on the railroad model you built. What would you like to see? What experience do you want to have?
2. Designing The Layout
Now that you have a concept in your mind, it is time to lay out the design. It includes the stuff you want to see in your railroad model that has something to do with the elements mentioned in number 1. These things must be connected with the theme, age or era, locale, scale, and display (such as seasons). For instance, if your theme has something to do about US Christmas, you may want to include some snowcapped terrains and pine trees.
3. Plotting The Tracks
Keeping the theme and concept in mind, you may now plan out the position of your tracks within your model. If you are a bit unsure how to do it, you can find already published track plans. Usually, track plans come in two types or a fusion of both – the point to point (simple switching layout) and the continuous running (or loop to loop). Again, keep in mind the theme and scale of your project when planning out your track.
WORKING ON THE RAILROAD
4. Building The Train Room
With the right setting and environment, you can set up your project easily and comfortably. Before even building your actual railroad model, make sure that you have a conducive space for working; that is, it has excellent lighting, heating, air conditioning, and space. You also have to ensure that the room is free from pests and critters that could ruin your figures.
5. Making Room for the Bench Room
The next thing you need to work on is the bench room. The effort involved in making the platforms to support your upper structures is daunting, but once you did it right, you'll see that everything slowly falls into place. Mind the space that you have. You may want to leave more than enough room to roam around your project later and observe it from afar.
6. Working With The Backdrop
This one's pretty easy. All you need to think about is the theme of your project. When choosing the pictures, paintings, or anything visual add-ons to the backdrop, make sure that they are connected to the theme for that sense of cohesion. The lightings in your train room also add to the ambiance that you hope to achieve.
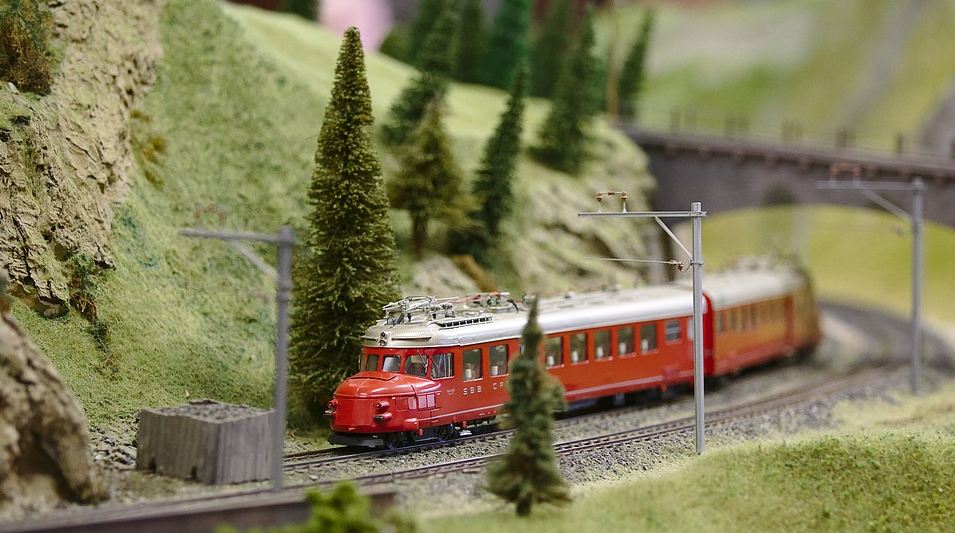
7. Building The Terrain
Build the terrain (the mountains, trees, rivers, hills, droves, etc.) that you plan to include within your model. Again, you have to plan it first before you permanently place them all across your railroad model. You can check online about some DIY projects on how to create miniature terrains if you're at it.
8. Laying The Track
At this point, you may now lay your tracks. At this stage, you will appreciate the careful planning you did initially, as you'll find that everything just falls into place. Assuming that you already know the basics, such as putting easements into the curves, knowing the clearances and distances so that your car can easily move through, and the installations (wirings) you may include, you're good to go.
9. Putting up the Wirings
Feeder wires are usually attached under or to the outside of the rails (approximately every three feet). But, some people say that every six or ten feet work just as fine, provided that the rail joints are tight. Working on the wirings can be challenging, especially if you are working on a large-scale project. But, taking time and focusing on installing the needed attachments will get you there in no time. Build a personalized control panel to organize the controls and run your model train without hassle.
10. Enhancing the Scenery
Now that everything is set, you just have to improve the scenic views in your terrain. The tiny little details that speak of your theme and concept give your DIY project that 'wow factor. It enhances the entire aesthetic value of the model. Be creative in adding details, like you may want to invent scenarios among mini-figures, put some roads and water bridges, depending on your theme.
11. Finishing Touches
For final touches, you can add some establishments and buildings that match your theme and the era of your inspiration. The fun part about adding these figures is that you get to personalize the details, like painting them according to your taste, but still keeping in mind that everything must be connected into a cohesive whole.